
My tutorial... my straight Luzia shorts or trousers
Here is the photo-illustrated tutorial that will help you make the Luzia shorts or pants. This tutorial complements and follows the step-by-step instructions provided with the pattern available in the shop here: Luzia shorts or pants pattern.
The explanations are identical for the shorts and the pants. Only the length differs.
STEP 1 - THE FRONT CREASE OF THE SHORTS/PANTS
To properly position the crease line, I advise you to fold pattern piece #1 at the "crease line" corresponding to the chosen size.
Place the folded pattern on one of the short fronts (wrong side) and fold the front wrong side to wrong side along the "crease line".

Press to mark the fold well and topstitch it 2 mm from the edge along its entire height (don't forget to remove the paper pattern first!).

Then press the front "flat", orienting the crease towards the side of the pants, then proceed in the same way for the second front of the shorts.
STEP 2 - THE POCKETS
Sew the front pocket bags and the back pocket bags right sides together.

Sew the right front pocket bag to the right front of the shorts, right sides together. Be careful, the back pocket bag is then between them, do not catch it in the seam. Proceed in the same way on the left side.

Turn the pocket to the inside, press and topstitch 2 mm from the edge. Be careful to only sew the shorts and the front pocket bag (do not catch the back pocket bag in the topstitching).

Place the top and side of the pocket well inside the shorts and baste the pocket with a seam 5 mm from the edge.

Attach the left side pocket of the shorts in the same way.
STEP 3 - THE BELT LOOPS
Sew the belt loops, two by two, right sides together.

Trim the seam allowance to 5 mm, turn right side out, and press.
Finally, topstitch 3 mm from the edge. This will give you 5 belt loops.

STEP 4 - ASSEMBLE THE WAISTBAND AND TOP OF THE SHORTS/PANTS
If the chosen fabric is soft, I advise you to apply fusible interfacing to the front and back waistbands.
Sew the fronts right sides together at their crotch seams, then press the seam open.
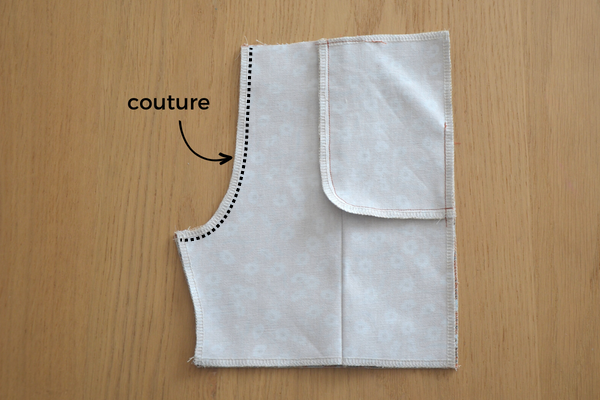
Then, sew the front waistband and the front of the shorts right sides together. Press the seam allowance upwards.

Place the belt loops on the top of the waistband, positioning them at the crease of the shorts, and baste them with a seam 5 mm from the edge.

Place the front waistband lining on the front waistband, right sides together. The belt loops are sandwiched between the waistband and its lining. And so, sew the front waistband and its lining.


Press the seam open.
Sew the backs right sides together at their crotch seams and press the seam open.

Sew the back waistband and the back of the shorts right sides together and press the seam allowance upwards.
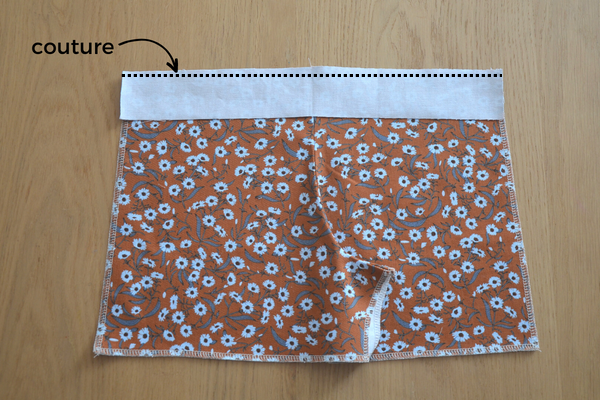
Place the belt loops on the top of the waistband: one belt loop in the middle of the waistband and the other 2 at 5 cm on each side.
Baste them with a seam 5 mm from the edge.

Place the back waistband lining on the back waistband, right sides together. The belt loops are sandwiched between the waistband and its lining. And so, sew the back waistband and its lining. Press the seam open.

STEP 5 - ASSEMBLE THE SHORTS/PANTS
Sew the front and back of the shorts right sides together at the side seams, from the top of the waistband lining to the bottom of the shorts. Be careful that the front and back waistband seams match up well. And remember to leave a 2.5 cm opening on one side at the waistband lining to insert the elastic.

Press the seam open.
Sew the front and back of the shorts right sides together at the inseams and press the seam open.

STEP 6 - THE WAISTBAND
Press a 1 cm fold all around the waistband lining, tuck the lining inside the waistband and press.

Pin or baste the lining so that it stays in place, then topstitch all around the waistband 5 mm from the top and bottom edges of the waistband to create the casing into which to insert the elastic.

Then attach the belt loops to the bottom of the waistband with a seam at the waistband seam.

Thread the elastic through the opening left in the waistband lining. Close the elastic by sewing the two ends together and reinsert it into the waistband.
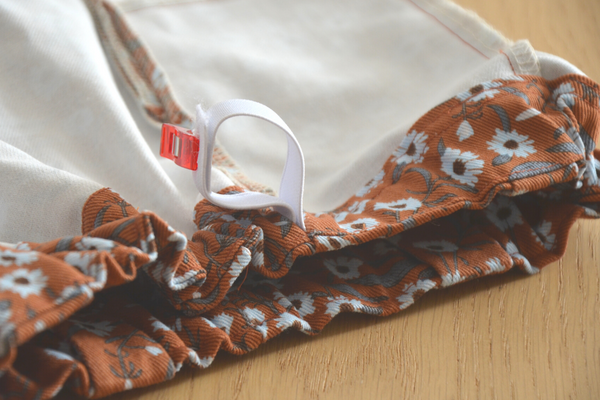
Finally, close the opening with small hand stitches.
Distribute the gathers created by the elastic so that the back is more gathered than the front.
STEP 7 - THE HEMS
To finish, press a first 1 cm fold at the bottom of each leg of the shorts, press a second 3 cm fold and secure it (before securing the hems, I advise you to try on the shorts or pants to adjust them to the desired length).

Your shorts or pants are now finished.
As a reminder, the pattern is available in the shop here: Luzia sewing pattern.
Happy sewing!
Lydie