My tutorial ... pretty gathers
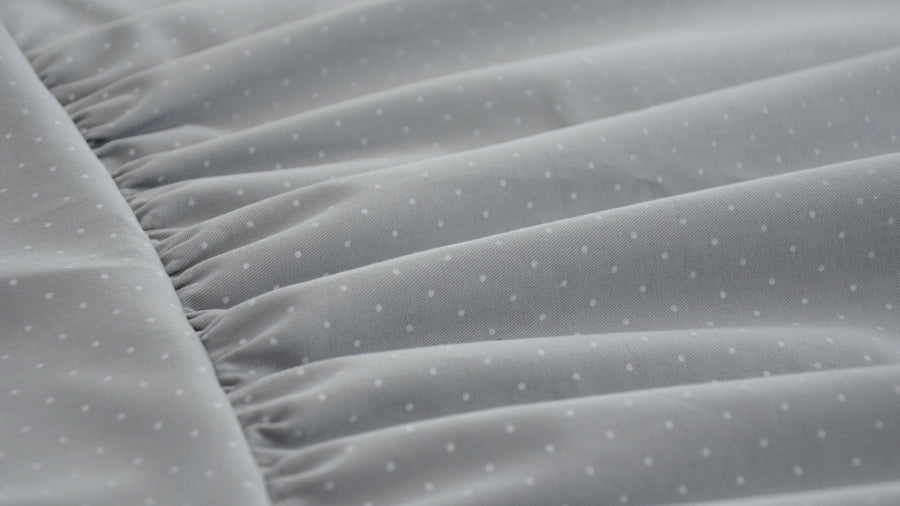
As promised, I'm putting together a tutorial with photos showing the different steps for making our "Happy" 4-season skirt. The first step is to prepare the front and back skirt panels... either by making pleats or by making gathers.
Let's start with gathers... I generally make my gathers with the machine. I find this method simple and suitable for sewing children's clothes (but there are other methods for which you can easily find tutorials online (elastic thread, hand gathering, gathering foot for sewing machine, etc...)).
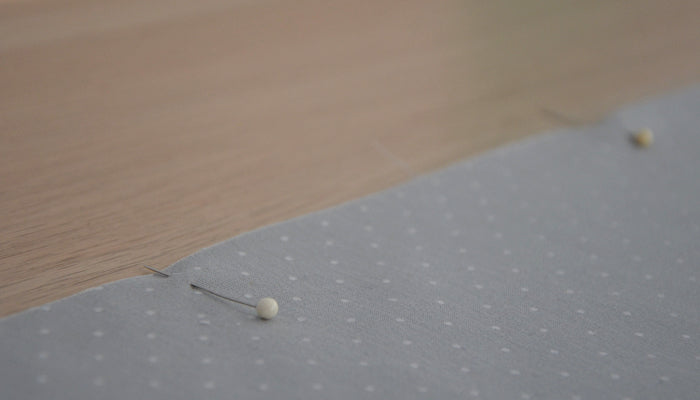
The main difficulty with gathers is distributing them evenly. I therefore advise you to start by dividing the length of the fabric to be gathered into 4 equal parts: locate the middle of the piece then the middle of each half (it's more complicated to write than to do... I hope I'm clear!).

You divide the piece with which it will be assembled (here the waistband) in the same way and mark these 3 points.

Several solutions are possible to mark these points:
- pins
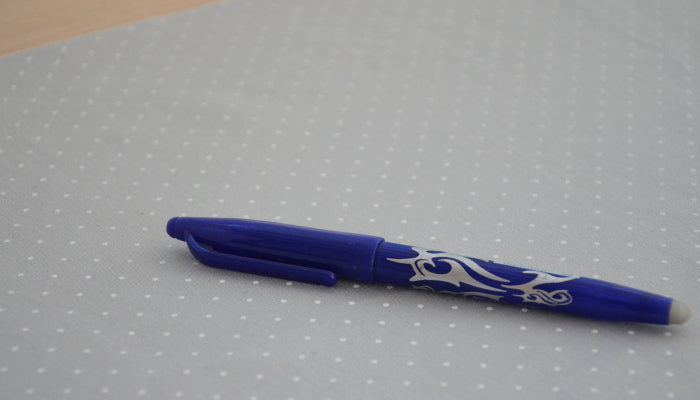
- chalk or erasable pen marking: Pilot Frixion pens are great for this because they erase with ironing (but first check that the pen comes off well on the fabric you have chosen, there can be unpleasant surprises!)
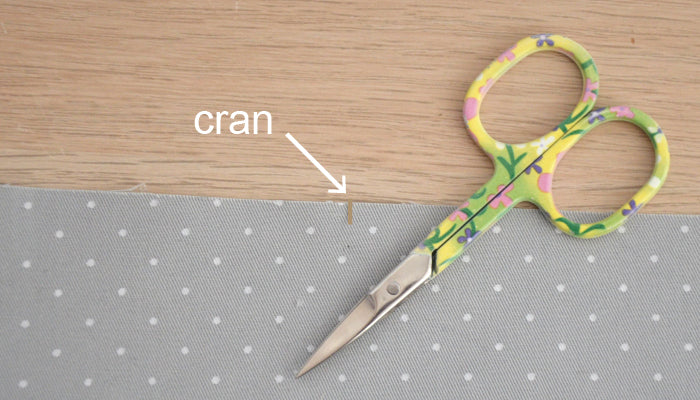
- or a small 2 mm notch made with scissors (this is my preferred method)
It's up to you to choose the method that suits you best... And obviously, if the piece of fabric is very long, you can divide the piece into 6, 8 or more for a more precise result...
Once the marks are made, it's time for the gathers: set your sewing machine's straight stitch to a stitch length of 4 (this is the highest available on my sewing machine).
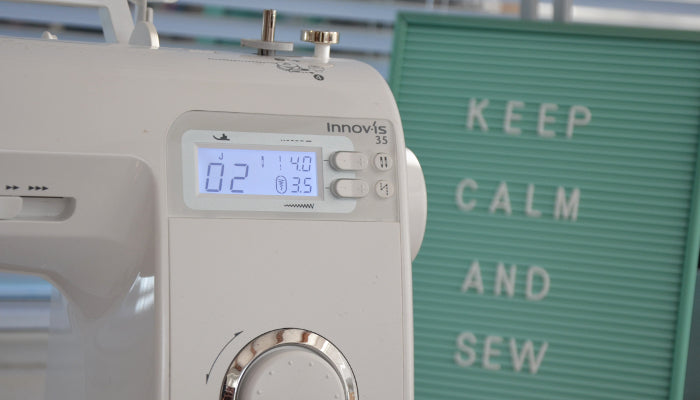
Make 2 lines of gathers: the first 3 mm from the edge, the second 1.5 cm from the edge. To clearly identify the gathering threads and differentiate them from the assembly seam, you can use a contrasting color thread.
Be careful not to make a backstitch at the beginning and end of the seam.

For some fabrics, this method is not suitable because the seam 1.5 cm from the edge marks the garment... Do a test...
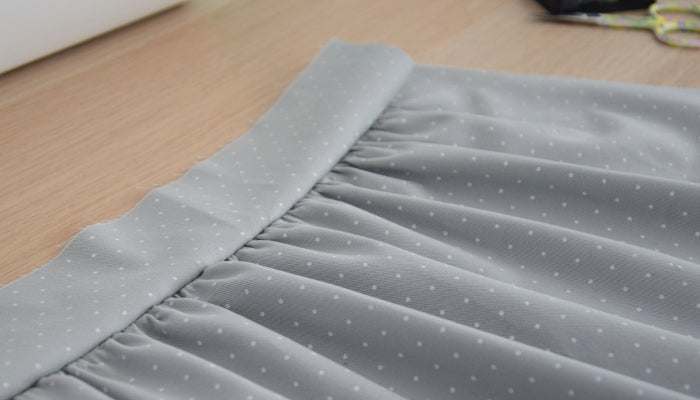
It's time to gather the fabric... Hold the two upper threads (needle threads) of the gathering lines together and gently slide the fabric to gather it until you get the length of the piece to which it will be assembled.

Once the gathers are made, assemble the skirts and their waistbands:
Pin the fabrics together along the entire length, matching the marks on the two pieces: the middle of the skirt with the middle of the waistband, and the same for the other 2 marks. Distribute the gathers so they are even.

Stitch between the 2 gathering lines (at 1 cm, which corresponds to the seam allowances provided in the pattern): remember to lower the stitch length of the sewing machine for assembly. I also advise you to place the gathered fabric facing you during assembly, which allows you to position the fabric correctly as you sew.
Finally, carefully remove the gathering threads and admire your work!
The "Happy" skirt pattern can be found in the shop here.
I hope everything is clear... I'm preparing the "inverted pleats" tutorial for you... See you soon!
Lydie
8 comments
J’ai acheté la semaine passée la blouse Enea que j’ai faite ce jour. Votre livret pas à pas est parfait. Merci pour toutes ces précisions qui aident énormément à la confection du modèle. Je garde précieusement votre adresse.
Bonsoir
Je vais commencer la blouse nouée pour fille 4ans
Je suis novice mais vos explications m’ont l’air très claires, merci
Très bien expliqué
merci des bons conseils ; je fais toujours mes fronces à la main et c’est fastidieux .
SUPER ces explications très claires!!
J ai une question : le tissu qui est froncé doit être plus grand de combien par rapport à l’ autre partie du vêtement en général?
Merci beaucoup! ☺