My tutorial... my Poppy gathered pinafore dress

In spring 2021, I re-released the Poppy dress pattern, adding a gathered version. This variation remains simple to make and is an excellent project for getting familiar with sewing gathers.
To create this gathered Poppy dress, start by downloading the latest free version of the pattern, available in baby sizes (3-36 months) or in girl sizes (4-14 years). Then, follow this photo-illustrated tutorial, which complements the step-by-step instructions included in the pattern and guides you step-by-step to easily create your gathers.
If you prefer to learn with a video, discover the Poppy gathered dress tutorial on my YouTube channel and follow the step-by-step creation live.
STEP 1 - DRESS PREPARATION
After cutting and overlocking the pieces, you need to gather the front and back skirts of the dress until they match the width of the front and back bodices they will be attached to.
For nice gathers, I use this method already presented previously: I advise you to start by marking the middle of the skirt, then the middle of each half (meaning you divide the width of the skirt into 4... it will be clearer in the photo...).
You mark the top of the dress to which it will be assembled in the same way (meaning you also divide the width of the top into 4).

Several solutions are possible for marking these points. I used a Pilot Frixion pen here (but check beforehand that the pen washes off the fabric you've chosen, there can be unpleasant surprises!).

Once the marks are made, set your sewing machine's straight stitch to a stitch length of 4 (this is the highest available on my sewing machine).

Make 2 lines of gathers: the first 3 mm from the edge, the second 1.5 cm from the edge. To clearly identify the gathering threads and differentiate them from the seam, you can use a contrasting color thread.
Be careful not to backstitch at the beginning and end of the seam.

For some fabrics, this method is not suitable because stitching 1.5 cm from the edge marks and damages the garment. Do a test.
Now it's time to gather the fabric: hold both top threads (needle threads) of the gathering lines together and gently slide the fabric to gather it until it reaches the width of the bodice.
Once the gathers are made, you assemble the skirts and bodices right sides together: pin the fabrics together along the entire length, matching the marks on the two pieces: the middle of the skirt with the middle of the bodice, and the same for the other 2 marks. And you distribute the gathers, so they will be very even.

Stitch between the 2 gathering lines (at 1 cm, which corresponds to the seam allowances provided in the pattern).
I advise you to place the gathered fabric facing you during assembly, which allows you to position the fabric correctly as you sew.
Finally, carefully remove the gathering threads.
You proceed in the same way for the front and back of the dress.
Press the seams upwards towards the top of the dress.

You assemble the front and back of the dress, right sides together, along the side seams, making sure to align the seams between the top and bottom of the dress.
Press the seams open.

STEP 2 - PREPARATION OF THE FACING
Assemble the front facing and back facing of the dress right sides together along the side seams.
Press the seams open.

STEP 3 - DRESS ASSEMBLY
Turn the dress right side out and slip it into the facing: the dress and the facing are then right sides together.
Pin them, carefully matching the side seams of the dress and the facing.

Assemble the dress and facing all around: necklines, shoulders, and armholes.

Reduce the seams to 5 mm,
make slits at the necklines and armholes,
and trim the corners.

Turn the facing into the dress and press, making sure to bring out the seams and the corners of the straps.
To keep the facing in place, topstitch along the side seams, catching both the dress and the facing in the stitch.

You can leave the facing "free".

You can also press a 1 cm fold at the bottom of the facing
and attach it with small hand stitches to the dress's seam allowances.

STEP 4 - FINISHING
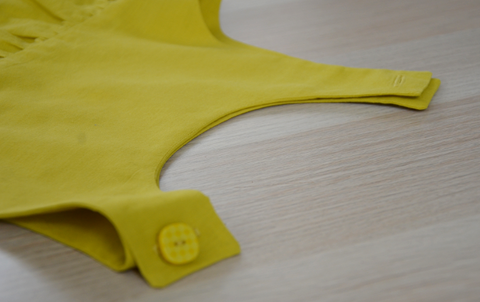
To close the straps, sew one or two buttonholes on the front straps and sew one or two buttons opposite them on the back straps.
I advise you to sew them 1.5 cm from the top.
If buttonholes scare you, you can also close the straps with snap fasteners. You can find plastic ones, in all colors, that are applied with pliers (from Prym, for example).
Finally, finish by sewing a hem at the bottom of the dress.
Here, I chose a fabric with a scalloped edge, so I didn't hem it.

To make the hem (double-stitched machine hem):
press a first 1 cm fold at the bottom of the dress.
Press a second 1 cm fold and secure it with a stitch 8 mm from the edge.
And there you have it, your gathered Poppy dress is ready!
This version is ideal for learning to work with gathers while remaining a simple model to make. Thanks to this tutorial, you can master the sewing steps, the PDF format, and the specific techniques for gathers, easily and step-by-step.
Once this dress is successfully made, explore my other baby and children's patterns to continue creating original clothes and develop your sewing skills.
Share your creations on social media with the hashtags #robepoppy, #robepoppybébé, and #lydieEcouture: I love discovering your creations and highlighting them!
61 comments
Je suis entrain de réaliser la robe Poppy froncée.
J’ai souhaité doubler la jupe , j’ai mis la doublure en haut de la jupe et j’ai froncée avec le tissu principal.
Dois je coudre les côtés de cette doublure avec le tissu principal de la jupe ou bien laisser les côtés indépendants comme un jupon .
Dans le cas où je prends la solution du jupon comment dois coudre ces côtés “endroit centre endroit” pour que cela sois joli.
Merci pour vos conseils, c’est toujours un plaisir de réaliser vos modèles.
Bonjour je n’arrive pas à trouver votre patron de la robe poppy froncé. J’ai celui sans fronces et j’aimerais bien faire celle avec les fronces pour mes 2 dernières petites-filles en 2ans et 7ans merci pour votre réponse bonne journée
Merci pour le patron de cette jolie petite robe que je vais essayer de coudre pour la petite fille 🥰
bonjour, j’aimerai faire la robe chasuble froncée pour ma petite fille de 2m , j’aimerai savoir comment vous calculez l’agrandissement à la taille pour la coupe de la partie jupe ….pour la hauteur où on doit placer ces fronces , j’ai l’impression que cela fait environ 1/3 2/3 êtes vous d’accord?
merci beaucoup et bravo!
J’ ai apprécié l’explication du partage des fdes fronces, après plusieurs années d’arrêt de couture je ne m’en souvenais plus. Merci beaucoup